0%

模型的训练

1、网格搜索

1.1、什么是网格搜索?

过拟合和欠拟合 中,我们是手动调整超参数 degree ,经由人工一一比对来获取最好的值,效率比较低下。因此我们引入网格搜索这个概念,不要被这个看起来很高大上的名词吓唬住了,其实逻辑十分简单,具体请看下述代码。

使用 sklearn 中自带的波士顿房产数据作为我们的测试数据。

1
2
3
4
5
6
7
8
9
10
import sklearn
from sklearn.model_selection import train_test_split
from sklearn import datasets
from sklearn.neighbors import KNeighborsRegressor

boston = datasets.load_boston()
X = boston.data
y = boston.target

X_train, X_test, y_train, y_test = train_test_split(X, y)

这里我们要网格搜索的参数即为 p,neighbor, weight。

可以看到所谓 网格搜索 就是使用 for-loop 像网格一样将你预设的可能的值都遍历一遍,依次寻求 score 最高的超参数组合。

1
2
3
4
5
6
7
8
KNN中的超参数:
- weights:含有 `uniform``distance` 两种模式
uniform 是正常的模式
distance 给 k 个相邻的点按照距离远近都赋予一个权重,离预测样本点距离远的权重就低一些,距离近的权重就高一些,

- p:闵可夫斯基距离参数
p = 1 时,等价于曼哈顿距离
p = 2 时,等价于欧拉距离
1
2
3
4
5
6
7
8
9
10
11
12
13
14
15
16
17
18
19
20
21
22
23
24
25
weights = ["uniform", "distance"]
best_score = -1
best_p = 0
best_neighbor = 0
best_weight = ""

for weight in weights:
for neighbor in range(1, 10):
for p in range(1, 10):
reg = KNeighborsRegressor(n_neighbors=neighbor,
weights = weight,
p = p,
n_jobs = -1)
reg.fit(X_train, y_train)
score = reg.score(X_test, y_test)
if score > best_score:
best_score = score
best_neighbor = neighbor
best_p = p
best_weight = weight

print("best_weight =", best_weight)
print("best_p =", best_p)
print("best_neighbor =", best_neighbor)
print("best_score =", best_score)

输出结果如下。

1
2
3
4
best_weight = distance
best_p = 1
best_neighbor = 3
best_score = 0.7420720968121362

注:KNeighborsRegressor 和 KNeighborsClassifier 思想相同。

KNeighborsClassifier 是找到附近 k 个数据,找到最多那个类别作为预测的类别,用于解决分类问题。

而 KNeighborsRegressor 是找到附近 k 个数据,然后取平均值作为预测的数值,用于解决回归问题。


1.2、scikit 中的实现

1
2
3
4
5
6
7
8
9
10
11
from sklearn.model_selection import GridSearchCV

params = {
"weights" : ["uniform", "distance"],
"p" : [i for i in range(1, 10)],
"n_neighbors" : [i for i in range(1, 10)]
}

knn_reg = KNeighborsRegressor()
grid_search=GridSearchCV(knn_reg, params)
%time grid_search.fit(X_train,y_train)

GridSearchCV 使用交叉验证来训练数据,即 train-validation-test。因此best_score_可能会比较低。

1
2
3
grid_search.best_params_ = {'n_neighbors': 5, 'p': 1, 'weights': 'distance'}
grid_search.best_score_ = 0.6091159004372775
grid_search.best_estimator_.score(X_test, y_test) = 0.7276418519232821

2、交叉验证

在之前模型的训练中,我们都是以测试数据集的 score 来衡量模型的好坏,换言之就是根据 test_score 来调整超参数,并从所有的模型中挑出 test_score 最高的作为我们的预测模型。但这样也会暴露出一个问题,在模型训练期间,我们的模型就已经见过了测试数据集,因此可能会过拟合测试数据集!

这样肯定是不对的,要模拟真正的生产环境,那么测试数据集就不能参与到模型的训练当中。我们只需要再引入一个验证数据集来代替之前测试数据集的作用就行了。
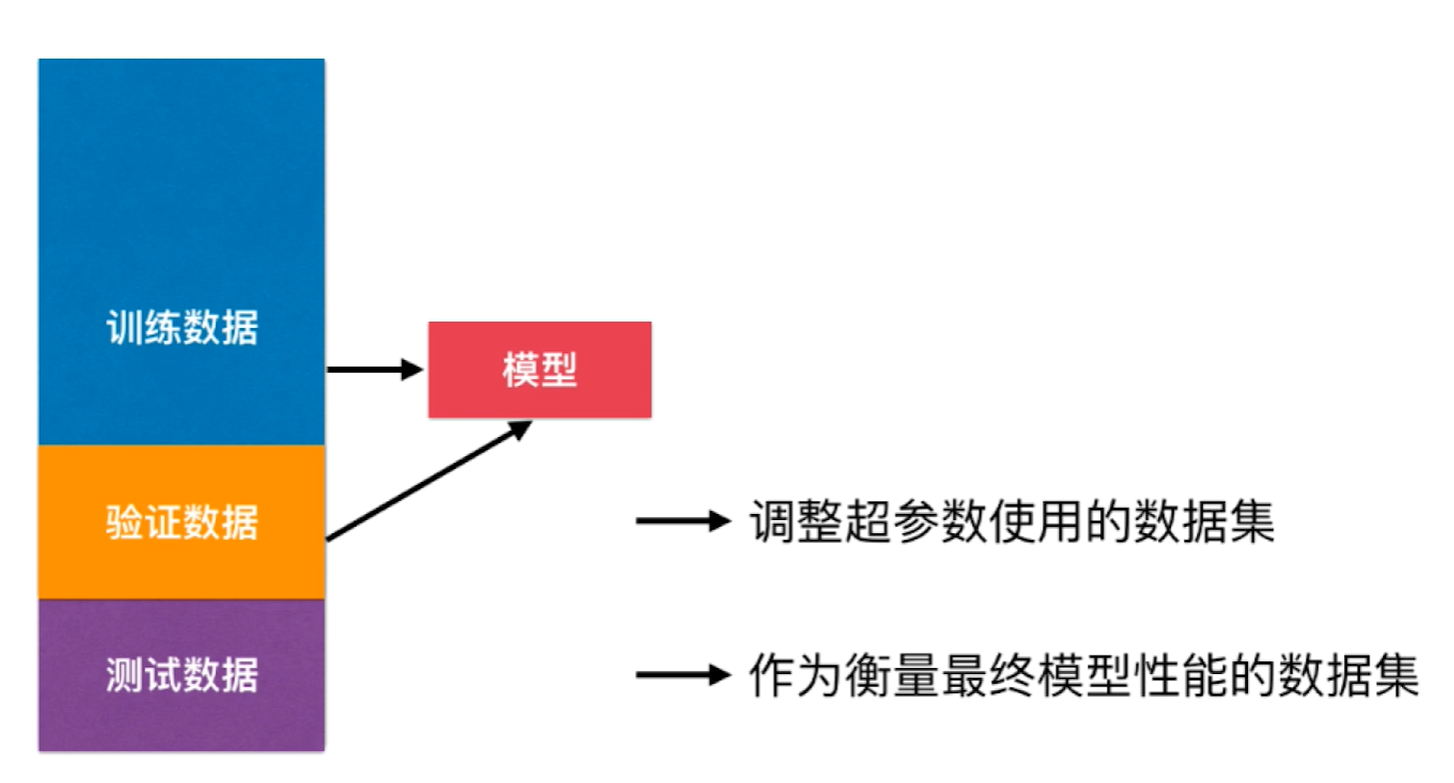
但其实这样也会有过拟合验证数据集的问题,因此就有了交叉验证。具体则是将训练数据集分成 K 份,从这 K 份当中选择一份作为验证数据集,其余 K-1 份作为训练数据集。一共有 $C^1_K = K$ 种分法,因此我们可以得到 K 个模型,因此这也被称为 K-folds Cross Validation(K折交叉验证),最后取他们在验证数据集上的均值作为判断模型好坏的依据。

这里提一句,在 scikit-learn 的网格搜索中,默认使用的是 cv = 5 的交叉验证,也就是五折交叉验证。

当交叉验证的 K = n_samples 时,会产生 n_samples 个模型,这时训练出来的模型完全不受随机的影响,将最接近模型真正的性能指标,代价就是训练时间会扩大 n_samples 倍,这就是 LOO-CV(Leave One Out Cross Validtion),也就是留一法。

2.2、代码实现

1
2
3
4
5
6
7
8
9
10
11
12
13
14
15
16
17
18
19
20
21
22
23
24
25
26
27
28
29
30
31
32
# 将第i份作为验证集
def get_k_fold_data(k, i, X, y):
assert k > 1
fold_size = X.shape[0] // k
X_train, y_train = None, None
for j in range(k):
idx = slice(j * fold_size, (j+1) * fold_size)
X_part, y_part = X[idx, :], y[idx]
# 第i份即为验证集
if j == i:
X_valid, y_valid = X_part, y_part
# 除第i份以外的第一份作为train的开头
elif X_train is None:
X_train, y_train = X_part, y_part
# 其余拼接到后面
else:
X_train = tf.concat([X_train, X_part], 0)
y_train = tf.concat([y_train, y_part], 0)
return X_train, y_train, X_valid, y_valid

# 交叉验证
def k_fold(k, X_train, y_train, num_epochs, learning_rate, weight_decay, batch_size):
train_loss_sum, valid_loss_sum = 0, 0
for i in range(k):
data = get_k_fold_data(k, i, X_train, y_train)
net = get_net()
train_loss, valid_loss = train(net, *data, num_epochs, learning_rate, weight_decay, batch_size)
train_loss_sum += train_loss[-1]
valid_loss_sum += valid_loss[-1]
print(f'fold {i + 1}, train log rmse {float(train_loss[-1]):f}, '
f'valid log rmse {float(valid_loss[-1]):f}')
return train_loss_sum / k, valid_loss_sum / k