Hexo的执行逻辑
Hexo是根据用户写的md文件进行渲染,得到对应的html文件在网站上显示。但有的时候会需要自定义页面,当然Hexo也给我们预留了解决方案。
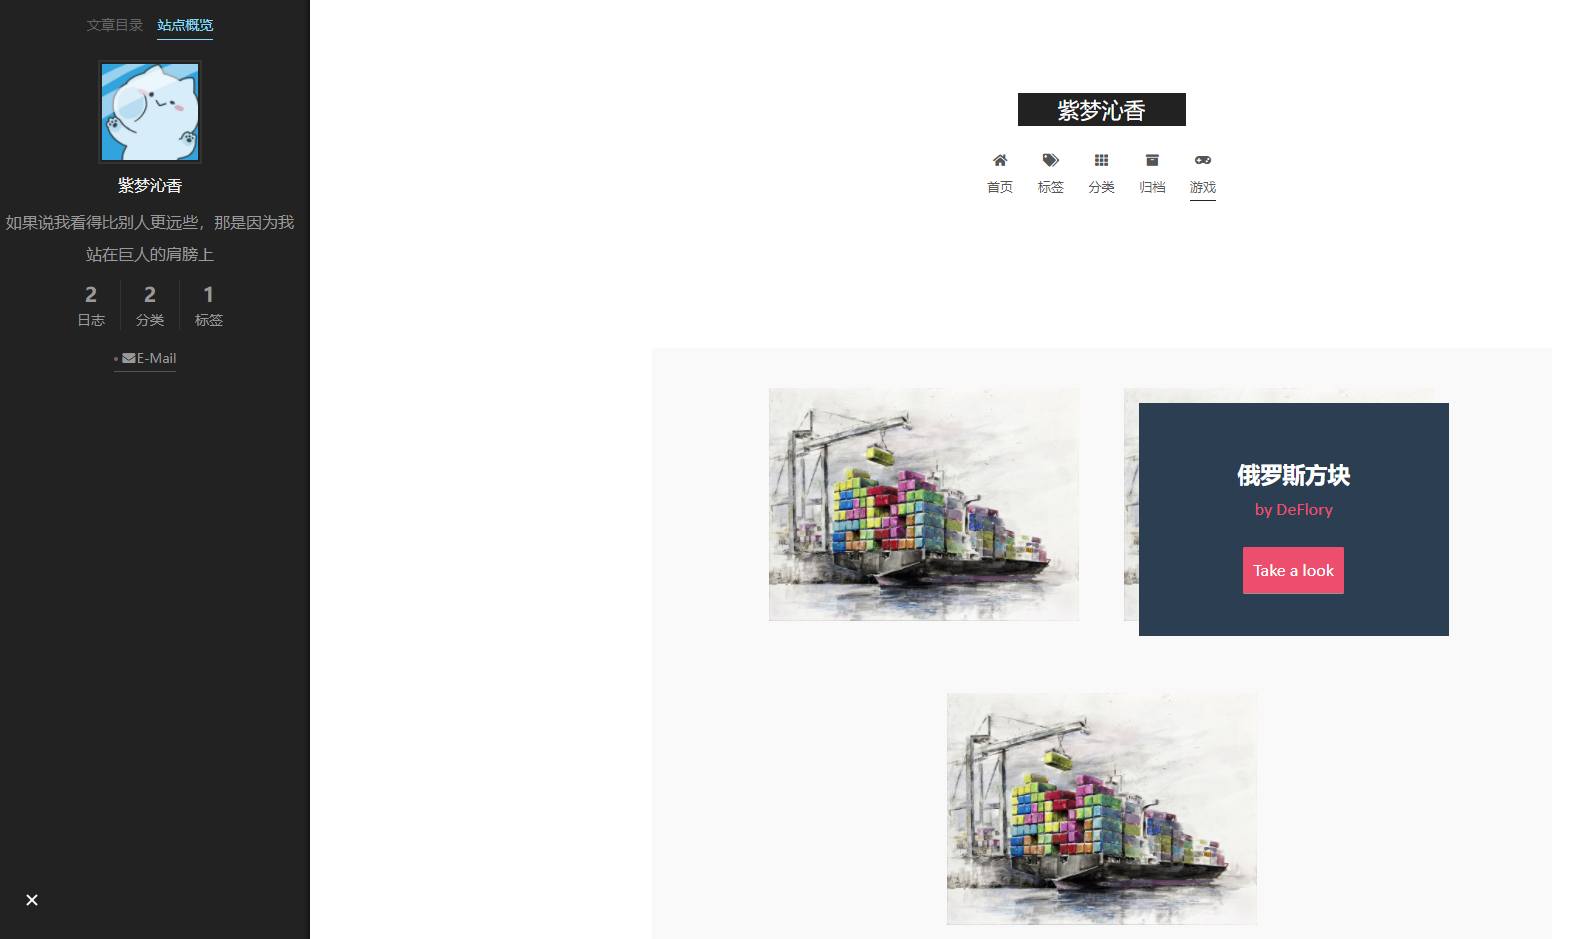
这里我要实现的效果就是新建一个游戏标签页,效果如下。

创建标签
首先,要新建一个标签页面就需要在NexT的配置文件中添加标签以及对应路由。
其中fa fa-gamepad是Font Awesome提供的矢量图标。
1
2
3
4
5
6
7
8
9
10
| menu:
home: / || fa fa-home
#about: /about/ || fa fa-user
tags: /tags/ || fa fa-tags
categories: /categories/ || fa fa-th
archives: /archives/ || fa fa-archive
#schedule: /schedule/ || fa fa-calendar
#sitemap: /sitemap.xml || fa fa-sitemap
#commonweal: /404/ || fa fa-heartbeat
game: /game/ || fa fa-gamepad
|
如果不想要英文的标签的话,以中文举例,可以到themes/next/languages/zh-CN.yml下添加game对应的中文。
1
2
3
4
5
6
7
8
9
10
11
| menu:
home: 首页
archives: 归档
categories: 分类
tags: 标签
about: 关于
search: 搜索
schedule: 日程表
sitemap: 站点地图
commonweal: 公益 404
game: 游戏
|
然后使用git命令hexo new page game,创建/game对应md文件。
注:如需更改一些全局样式,可到Next配置文件的custom_file_path中修改
自定义渲染
自定义渲染分为两种,一种是主题内渲染,一种是完全页面渲染。
1.主题内渲染
layout: false表示该md不会经过layout的渲染。
同时可以保存添加的模块,主题的头部信息,仅对主体部分进行自定义。
1
2
3
| title: game
date: 2021-08-26 15:45:42
layout: false
|
这里头部的导航栏以及侧边的统计栏都是保存的。

2.完全页面渲染
在Hexo的配置文件中,skip_render用来配置跳过渲染的文件。
例:skip_render: game/*,指game/下的文件不会被渲染。
若是game/**则代表目录递归,包含子目录中的文件。
或是指定某个文件:game/index.md
1
2
3
4
5
6
7
8
9
| # Directory
source_dir: source
public_dir: public
tag_dir: tags
archive_dir: archives
category_dir: categories
code_dir: downloads/code
i18n_dir: :lang
skip_render: game/*
|
完全页面渲染正如其名,不会包含主题模块等信息,全权由自己来设计。
这里我还没有添加CSS和JS。

自定义CSS
主题内渲染由于头部信息是主题给定的,因此CSS不能直接使用html的<style>导入CSS,JS同理。
所以需要直接给NexT添加我们需要的CSS文件。
在themes/next/source/css中,首先创建CSS文件的目录,为了与主题自带的CSS区分开,我们新建一个文件夹_mycss,然后创建game.styl,代码如下。
1
2
3
4
5
6
7
8
9
10
11
12
13
14
15
16
17
18
19
20
21
22
23
24
25
26
27
28
29
30
31
32
33
34
35
36
37
38
39
40
41
42
43
44
45
46
47
48
49
50
51
52
53
54
55
56
57
58
59
60
61
62
63
64
65
66
67
68
69
70
71
72
73
74
75
76
77
78
79
80
81
82
83
84
85
86
87
88
89
90
91
92
93
94
95
96
97
98
99
100
101
102
103
104
105
106
| .game_img *,.game_img *:after,.game_img *:before { -webkit-box-sizing: border-box; -moz-box-sizing: border-box; box-sizing: border-box; }
body .game_img, html .game_img { font-size: 100%; padding: 0; margin: 0;}
body .game_img{
font-family: 'Lato', Calibri, Arial, sans-serif;
color: #b3b9bf;
background: #f9f9f9;
}
.game_img a {
color: #888;
text-decoration: none;
}
.game_img a:hover,.game_img a:active {
color: #333;
}
.grid {
padding: 20px 20px 100px 20px;
max-width: 1300px;
margin: 0 auto;
list-style: none;
text-align: center;
}
.grid li {
display: inline-block;
width: 350px;
margin: 0;
padding: 20px;
text-align: left;
position: relative;
}
.grid figure {
margin: 0;
position: relative;
}
.grid figure img {
max-width: 100%;
display: block;
position: relative;
}
.grid figcaption {
position: absolute;
top: 0;
left: 0;
padding: 20px;
background: #2c3f52;
color: #ed4e6e;
}
.grid figcaption h3 {
margin: 0;
padding: 0;
color: #fff;
}
.grid figcaption span:before {
content: 'by ';
}
.grid figcaption a {
text-align: center;
padding: 5px 10px;
border-radius: 2px;
display: inline-block;
background: #ed4e6e;
color: #fff;
}
/* 说明文字样式 1 */
.cs-style-1 figcaption {
height: 100%;
width: 100%;
opacity: 0;
text-align: center;
-webkit-backface-visibility: hidden;
-moz-backface-visibility: hidden;
backface-visibility: hidden;
-webkit-transition: -webkit-transform 0.3s, opacity 0.3s;
-moz-transition: -moz-transform 0.3s, opacity 0.3s;
transition: transform 0.3s, opacity 0.3s;
}
.no-touch .cs-style-1 figure:hover figcaption,
.cs-style-1 figure.cs-hover figcaption {
opacity: 1;
-webkit-transform: translate(15px, 15px);
-moz-transform: translate(15px, 15px);
-ms-transform: translate(15px, 15px);
transform: translate(15px, 15px);
}
.cs-style-1 figcaption h3 {
margin-top: 35px;
}
.cs-style-1 figcaption span {
display: block;
}
.cs-style-1 figcaption a {
margin-top: 20px;
}
|
然后返回上一级目录,现在在themes/next/source/css中,打开main.styl在尾部添加如下代码,将我们的CSS导入进来就好了!
一定要加注释!不然过几天都不知道这一段CSS是干什么用的。
1
2
| //Games
@import "_mycss/game";
|
自定义JS
同CSS一样,来到themes/next/source/js下,先创建一个我们自己的JS文件夹game,然后将我们预先下载好的modernizr.custom.js放在该目录下,准备工作就完毕了。
然后就需要导入JS文件,我们打开themes/next/layout/_layout.swig,在<head>标签下,添加JS路径,就大功告成了!
1
| <script type="text/javascript" src="/js/game/modernizr.custom.js"></script>
|
HTML代码
最后附上我的HTML代码,目前只有一个框架,游戏还没有写🌝
1
2
3
4
5
6
7
8
9
10
11
12
13
14
15
16
17
18
19
20
21
22
23
24
25
26
27
28
29
30
31
32
33
34
35
| <div class="game_img">
<ul class="grid cs-style-1">
<li>
<figure>
<img src="/uploads/images/tetris.jpg" alt="img04">
<figcaption>
<h3>俄罗斯方块</h3>
<span>DeFlory</span>
<a href="#">Take a look</a>
</figcaption>
</figure>
</li>
<li>
<figure>
<img src="/uploads/images/tetris.jpg" alt="img04">
<figcaption>
<h3>俄罗斯方块</h3>
<span>DeFlory</span>
<a href="#">Take a look</a>
</figcaption>
</figure>
</li>
<li>
<figure>
<img src="/uploads/images/tetris.jpg" alt="img04">
<figcaption>
<h3>俄罗斯方块</h3>
<span>DeFlory</span>
<a href="#">Take a look</a>
</figcaption>
</figure>
</li>
</ul>
</div>
|


